We have improved our Metabox Generator to support the wp-color-picker script when you use “color” fields. In this post I will show you how you can leverage this nice little feature in your projects.
At GenerateWP HQ we’ve been thinking lately about how we can add more color to the Metabox generator, and we came to an idea…
Colors. They make things come alive, they’re everywhere. And now we’re welcoming them into our Metabox Generator.
You might be asking — how can this tool come handy for me? You might be even dealing with anything color-related strictly through your CSS files. So we thought we’d write this quick walkthrough for the process of expanding your possibilities using this new nifty color field.
In this guide, you are going to create a metabox where you’ll set two custom colors for a post: A primary color and a secondary color. Both fields will be saved as Custom Fields. Each field will have a default color, just in case the post author forgets to set a custom color, or in case you don’t want this field to be mandatory.
Creating The “Post Colors” Metabox
1. The General tab
Alright, now let’s start off by filling in some general information like the (PHP) class name, prefix, text-domain and some security checks (where the WP Nonce check is the most important).
- Class Name is the representation of this Metabox instance in your PHP code. It should not contain spaces and should consist of letters, numbers and underscores (_) only. Also, the first character must be an alphabetic character.
- Prefix ensures your generated input elements will not conflict with any pre-existing content on the same page.
- Text Domain is a WordPress built-in feature that allows you to assign all user-visible strings to your WordPress plugin or theme. Similar to the Prefix field, this field needs to be as unique as possible. (A common choice is the abbreviation of your theme or plugin’s name. You could also add your initials in front. Example:
ry_colors_) - Security Checks offers different ways to validate your content before it gets processed and written into the database. The most common (and crucial) check is the Nonce check. This protects your code against any CSRF attacks.

2. The Meta Box Tab
Next is the Metabox information. We need to fill in a few of these fields as part of the basic setup: fields like the Metabox (HTML) ID, Metabox title, the specific screen in which you wish to display the Metabox, locations of the and priorities:
- Meta Box ID is the string by which WordPress identifies this Metabox. Alphanumeric characters only!
- Title is the Metabox’s title as shown in the dashboard interface.
- Callback Function is the callback function within the generated PHP class which handles the output of the HTML content for this Metabox. This is optional.
- In Screen you may define the name of the screen you’d like to embed this Metabox in. For example, say I want this Metabox to show only under the “candidate” post type (completely fictional for the sake of this example) — then I’d simply type
candidate.

3. The fun part — adding the fields
Okay, now that you have the essentials set up, you can get to it and start adding the fields.
Go ahead and title the first field as “Primary Color”. Also, go ahead and give it default color, in case the user forgets to set a post color.
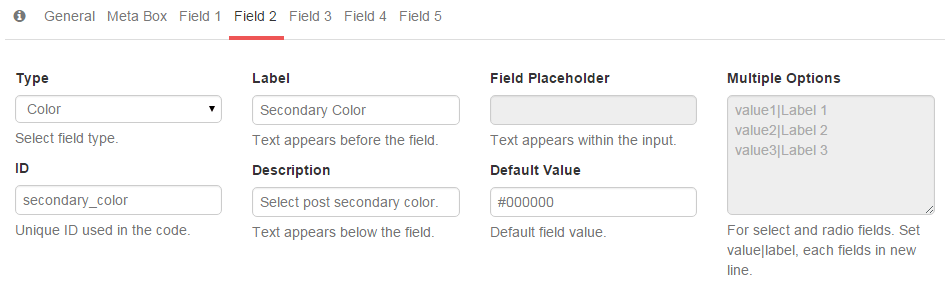
The fields are pretty much self-explanatory but I’ll go over them for the sake of this example.
- Type is the type of field you’d like to create. We currently support a wide variety of fields to choose from. The most common ones are Text, Textarea (large text box), Email, True/False (which renders as two radio buttons: Yes and No), Checkboxes and Select. In this guide I’d like to focus on the new (at the time of writing) “Color” field.
- ID is the identifier for this field that is being used both in the outputted HTML as well as for storage in the database.
- Label is the title of this field. It will show to the left of the field (or to the right of it if your site is RTL-enabled.)
- Think of Description as help text for your fields. Just like in WordPress’ own settings pages. Explain here the details of this field, and focus on what kind of input you are expecting from your users.
- Some fields have the Field Placeholder enabled, some don’t. If you’d like some short explanatory content for this field, then write it down here. The text will disappear once users start typing.
- Default Value lets you override the content with pre-existing, hardcoded text. Can be useful in some scenarios.
- Multiple Options is enabled for any of the “Multiple Choice” fields (a group of fields under Type). Lets you assign bulk content in an efficient way. Each new line would become an option, but don’t forget to insert them in a
key|valueorder.

First field is in. Check. Now add the secondary color field. Notice I modified most of the fields. Pay special attention to the ID field. It must be different than the first one so the value won’t be overridden when saved.
That’s all for generating the Metabox! Now all is left for you to do is click the “Update Code” button and copy the code to your site or store as a plugin and activate it.
Going the extra mile
You now have a working Metabox at your service. Super quick. But how about implementing it so you can fully understand how this works? You can skip to the end, but if bare with me, then I’ll show you how you can implement this into your project.
I’m going to show you a random example, but I trust you can target this knowledge towards whatever needs you may have.
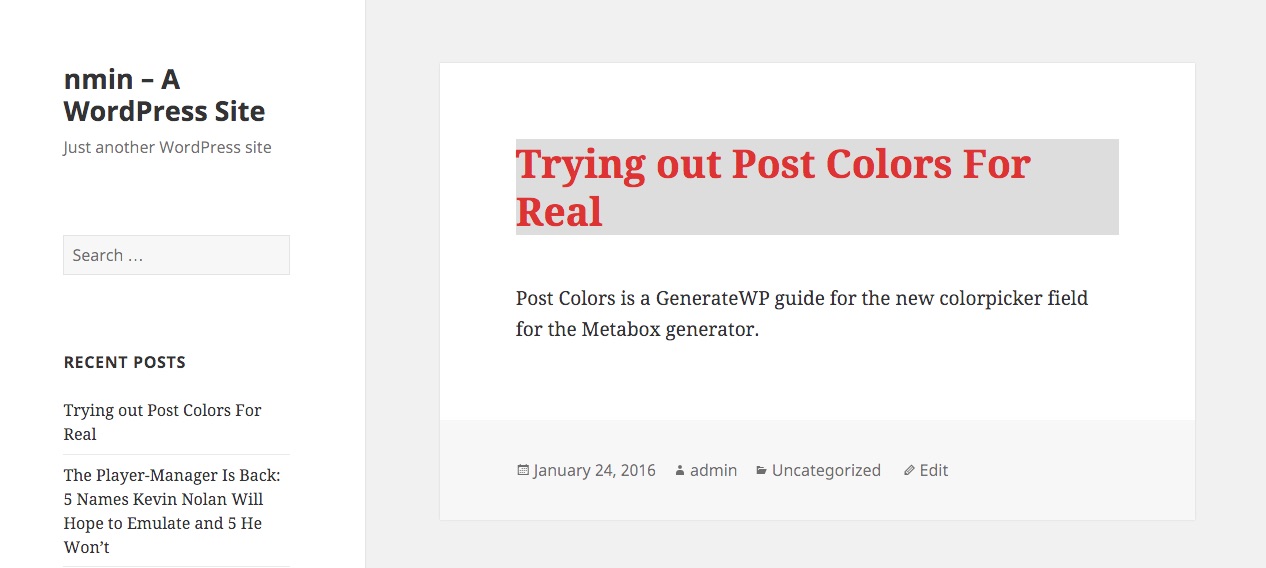
What I’m going to do here is set the color of the title to whatever value is set in the Primary Color field, and its background to Secondary Color’s value.
Before you start anything, copy the generated code into your project. Do it by copying the code over to your theme’s functions.php file or as an independent new file in mu-plugins.
Quoted here is the generated code I got by following the same steps as before, you can use it instead of yours if you prefer.
Now, what’s left to do is the front-end implementation. I’ve decided to apply the colors to the post title. For this example I have the Twenty Fifteen theme installed.
Using this piece of code, I’m going to set the Primary Color to the post title, and the Secondary Color to the background of that same title. Pretty neat? For sure. Useful? Not really. But again, this is just for demonstration purposes.
To do that, I’m going to hook into the wp_head action, and add CSS rules that will cause the color changes. I’ve intentionally avoided using inline CSS as this is not a best practice. Instead, we’re using Internal CSS with the <style> HTML tag.
The steps to accomplish that are:
- First make sure end-user is viewing a single post page. Otherwise, let’s quit.
- Next, fetch the colors from post meta. Pay special attention to the prefix used here (
gwp_pc_) when runningget_post_meta(). - Check if all colors have been set. If not, we’re not going to display anything (because we need the combination of the two in order to display one on top of the other)
- By this point, as an extra, I’ve added a sanitization function as a wrapper just to make sure we’re not going to print a value that is not a valid HEX code, which might cause errors for the CSS processor.
- If all good by this point, print out a <style> pair including the relevant CSS.
Copy this little snippet over to your theme in a similar manner as before. There’s nothing for you to change here as long as you have Twenty Fifteen set as your active theme.
Testing it out
OK, now let’s see how this works. Go ahead and create a new post or edit an existing one. Set some colors to the Primary and Secondary fields in our shiny new Metabox and publish the post.

When the post is viewed on the front-end you can see the effects. Huzzah! ✨
The End Result
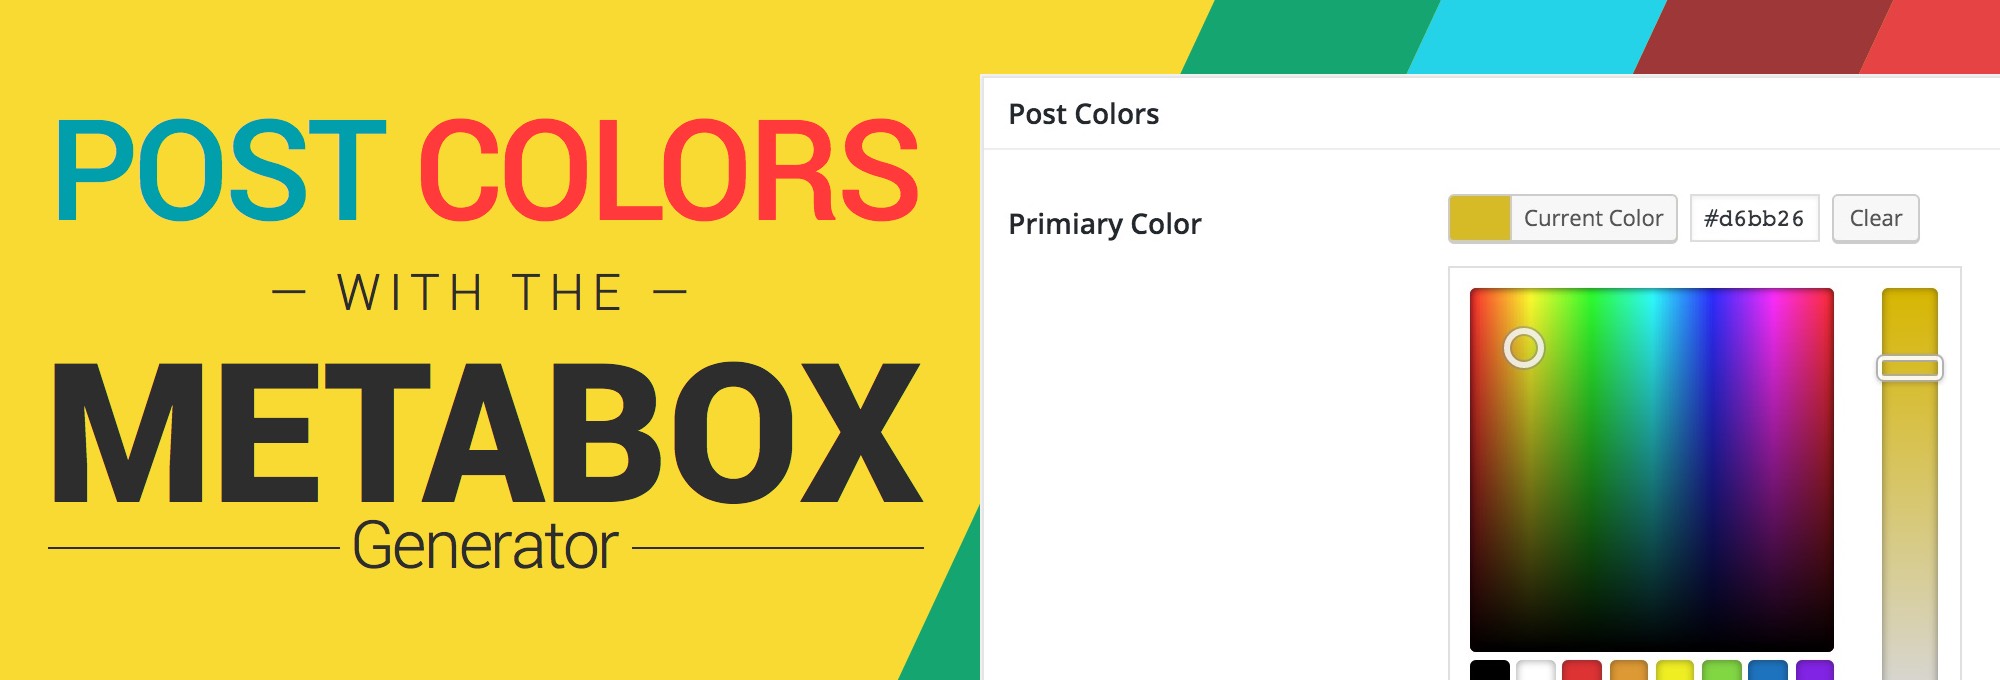
In the WordPress dashboard (meaning under the relevant Screen), each of your posts will have this metabox available:

The cool thing is that the code utilizes WordPress’ built-in colorpicker script that looks like this:

This guide has been a very simple example just to show you the concept and the capabilities of this new field.
You can create complex sites with many Custom Fields and multiple color fields. To illustrate this point further, we can create a new site with different colors for each article/section, or a monthly magazine with different colors for each issue.
Using Custom Fields we can override default theme colors and set custom color to any element we wish, be it a title, stripe, background or whatnot.

3 Comments:
wpshop
Example width output code in Twenty Fifteen section width some errors. Look at 8 and 36 lines.
Raju Kumar
Really very simple and small code but out standing result. some people do so mnay lines of codes for small things or many files includes blah blah but your code
1 simpel
2 small
3 clean
4 Customizable
thanks
Raju Kumar
can we do for custom post type